
This guide walks you through using Hugging Face models on the Qubrid AI platform, including deployment on instances with on-demand GPUs.
Note: Currently, this feature supports only Text Generation (instruct-type) models from Hugging Face.
Pre-requisites
- Hugging Face Account: Ensure you have an account on Hugging Face to access private or public models.
- Model Access: Use either:
- Your own custom-trained model.
- Open-source models available on Hugging Face with proper licensing.
Finding the Model Name
To deploy a model from Hugging Face, you need its model name, which is part of the model’s URL. Follow these steps:
- Log in to your Hugging Face account at huggingface.co
- Navigate to the Models section by clicking on the “Models” tab in the top navigation bar.
- Search for your desired model using the search bar or browse through your private/public models.
- Click on the model you want to deploy.
- The model name is visible in the URL of the model page <username>/<model-name>. https://huggingface.co/

Example: Fordeepseek-ai/DeepSeek-R1, the model name is DeepSeek-R1.
- API Token: Obtain a valid Hugging Face token, ensuring necessary permissions are granted for accessing the model.
Generating and Finding Your Authentication Token
The authentication token is required to access private models or perform API-based actions on Hugging Face. Here’s how you can generate or retrieve it:
- Log in to your Hugging Face account at huggingface.co.
- Click on your profile picture in the top-right corner and select “Settings” from the dropdown menu.
- In the left-hand menu, click on “Access Tokens.”
- If you don’t already have a token, click “New Token” to generate one:
- Provide a name for your token (e.g.,
Qubrid Deployment). - Set appropriate permissions (e.g.,
readaccess for public models orwriteaccess if needed). - Copy your token once it’s generated.
Notes:
Keep your token secure and do not share it publicly.
If you lose your token, you can always revoke it and generate a new one.
For more details, refer to Hugging Face’s official documentation on authentication tokens:
User access tokens
- Certifications: Verify that your selected model has the required certifications for deployment.
Steps to Deploy a Hugging Face Model on Qubrid AI
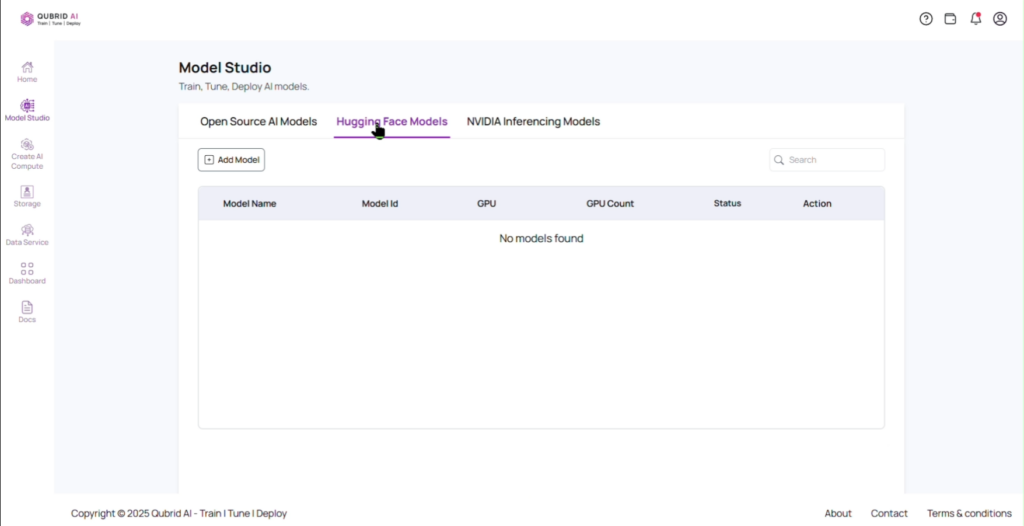
- Access the Model Studio
1.a. Log in to the Qubrid AI platform.
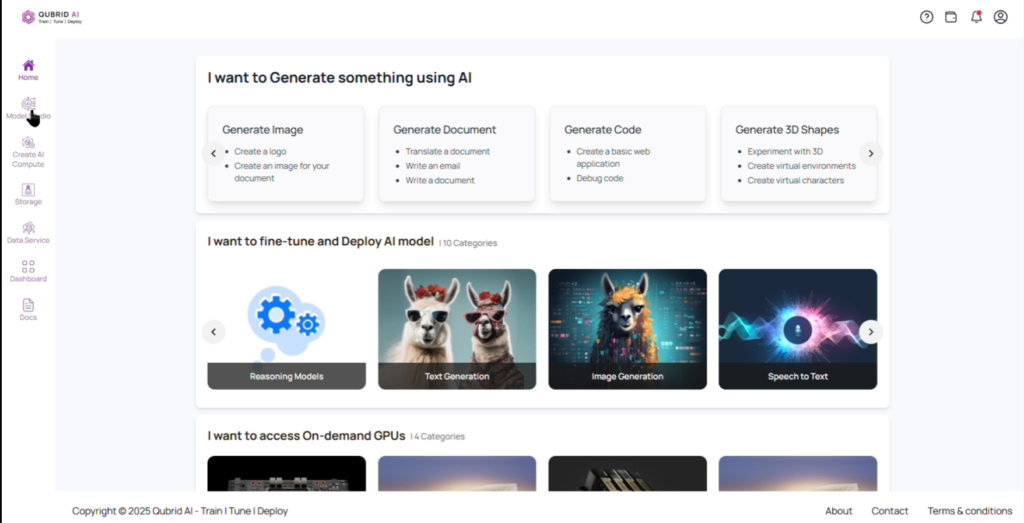
1.b. Navigate to the Model Studio from the homepage and select the Hugging Face Models section.

Navigate to Hugging Face Models on Qubrid AI – Complete Guide
- Add Your Model
2.a. Click on the “Add Model” button.
Note: We currently support only text generation models, including reasoning models, instruct models, and chat models.

2.b. Provide a unique Name and an optional Description for your model.
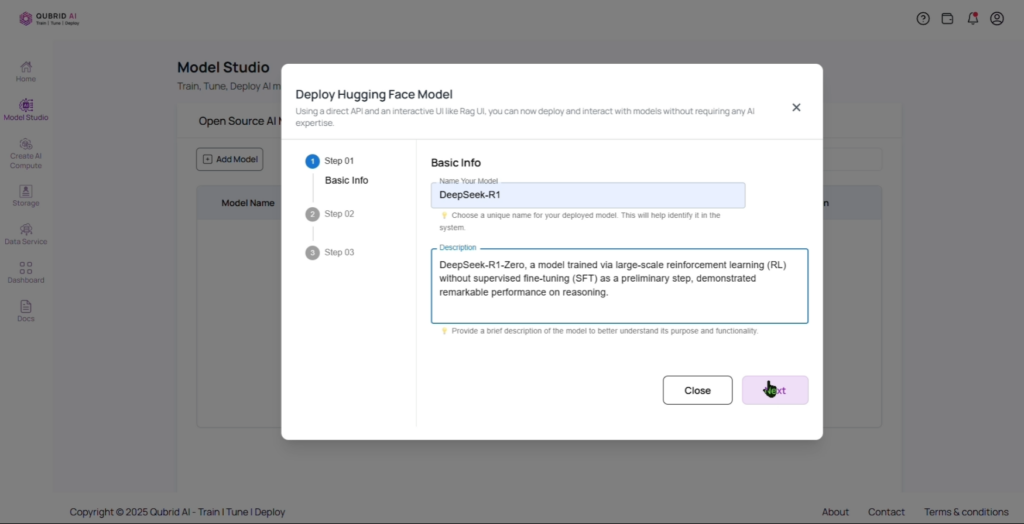
Add Name and Description for Your Hugging Face Model – Complete Guide
- Link Your Model
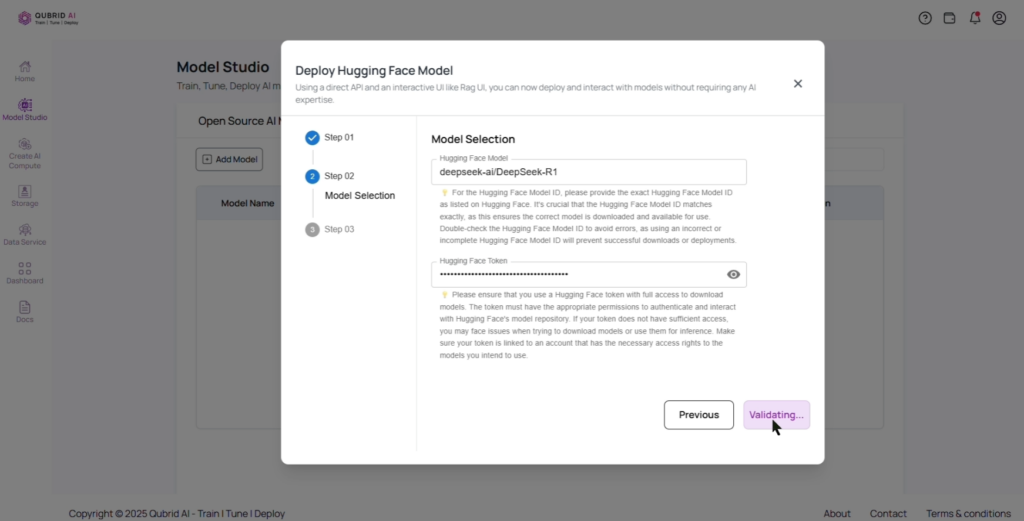
3.a. Paste the Hugging Face model link and provide your API token.
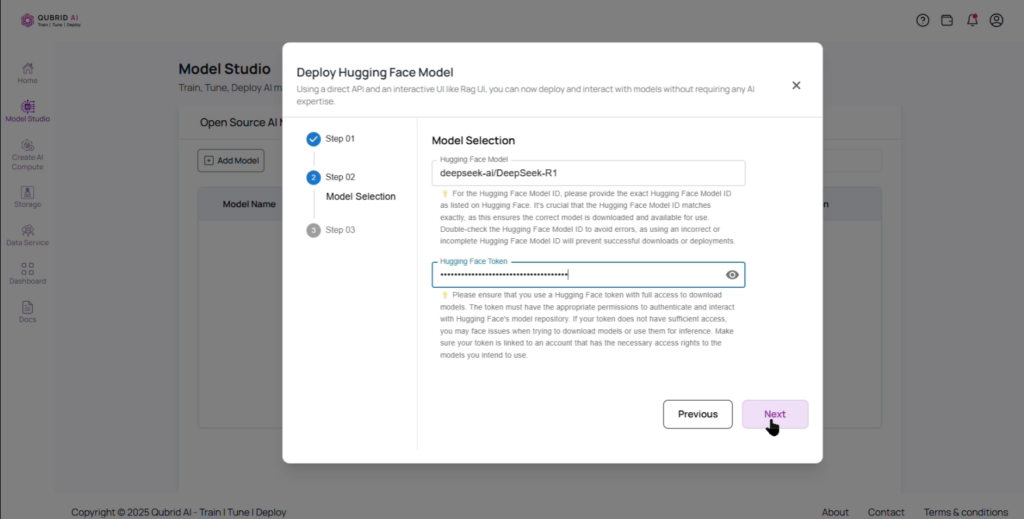
3.b. Wait for token validation to ensure proper access.
Adding Model Name and Description – Complete Guide
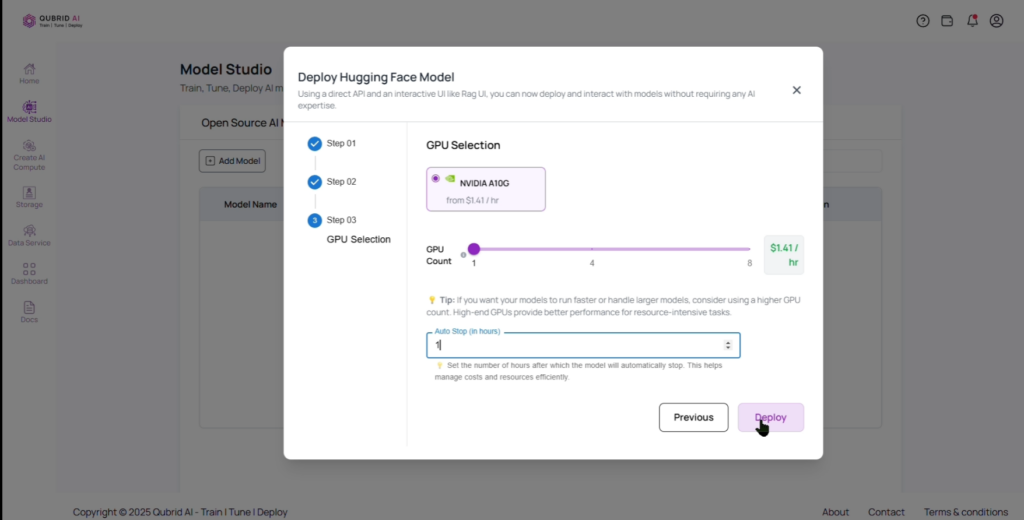
4. Select GPU Resources
4.a. Choose a GPU configuration that meets your computational needs (NVIDIA A10G) select the GPU count and auto-stop(hours).
Guidance on Model Size and GPU Selection
The A10G GPU has 24GB of memory, which determines the model size it can support. Below is guidance on GPU count and the maximum model size:
1 x A10G (24GB) → Supports models up to 20B parameters
4 x A10G (96GB) → Supports models up to 90B parameters
8 x A10G (192GB) → Supports models up to 180B parameters
Select the appropriate number of GPUs based on your model size to ensure smooth deployment and performance.
4.b. Click “Deploy” and wait a few minutes for deployment.
Note: Deployment time varies based on model size and may take 15 minutes or longer—the larger the model, the longer the deployment. Deployment instances are charged on an hourly basis($1.41 per hour per A10G GPU).
Select GPU Resources – Complete Guide
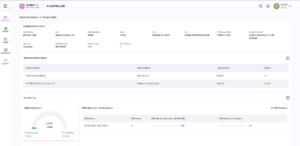
5. Monitor Deployment
5.a. Check the deployment status in the dashboard.
Note: The status changes from Deployment – In – Progress>Model Loading >Deployment Ready. Wait until it shows “Deployment Ready” before proceeding with further actions.
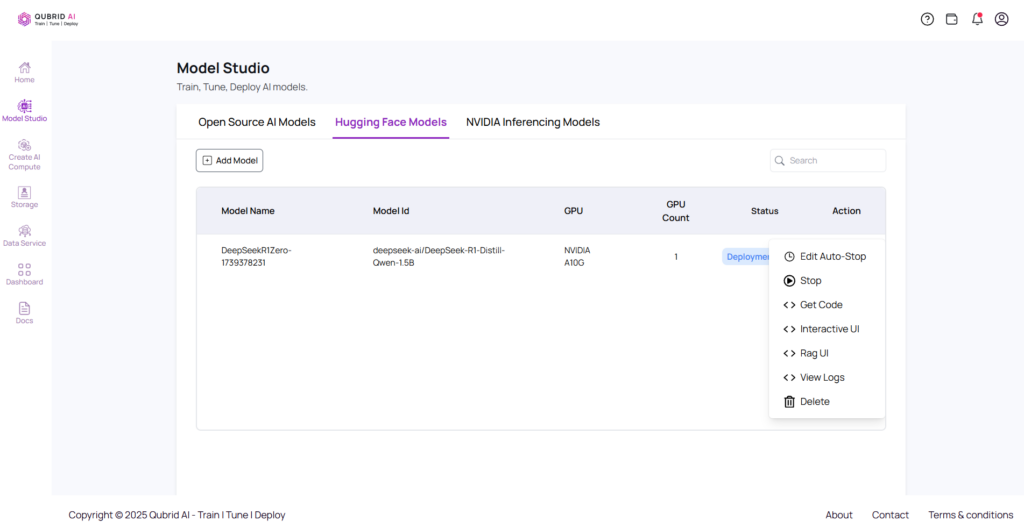
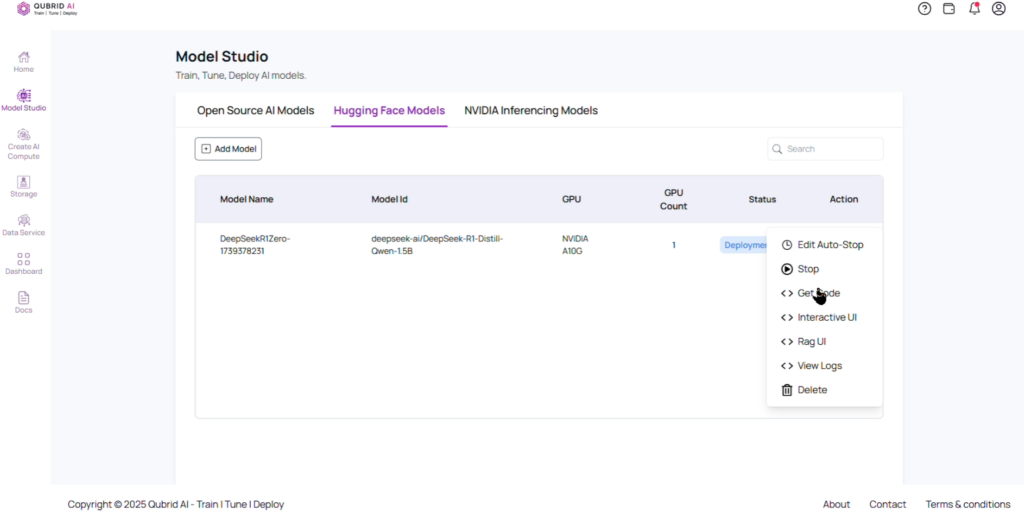
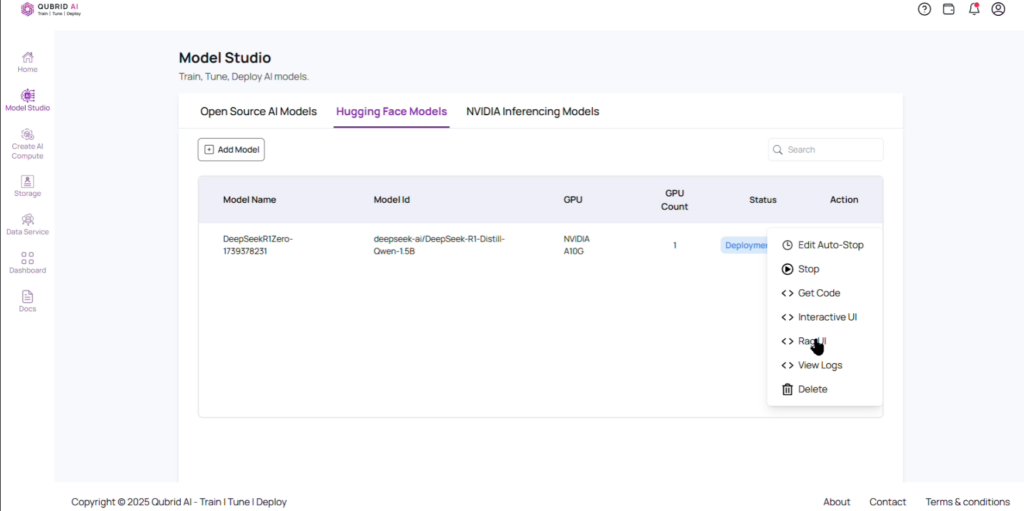
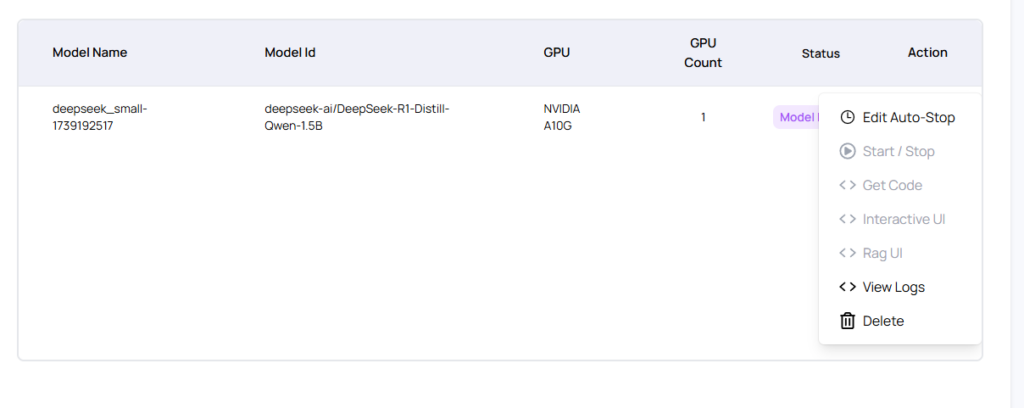
6. Interact with Your Model
6.a. After your deployment is ready, click on the Actions button to access multiple options: Edit Auto-Stop, Stop, Get Code, Interactive UI, Rag UI, View Logs, and delete.
- Get Code
7.a. Navigate to Actions and Select “Get Code” to Retrieve CLI Interaction Code
7.b. Retrieve the code to interact with your model using Curl, Python, or React.
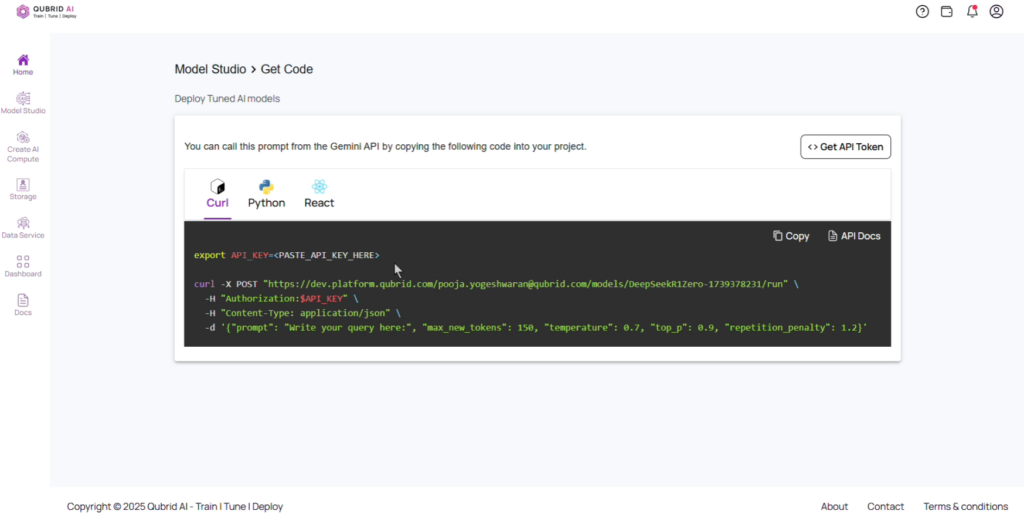
Get Code – Complete Guide
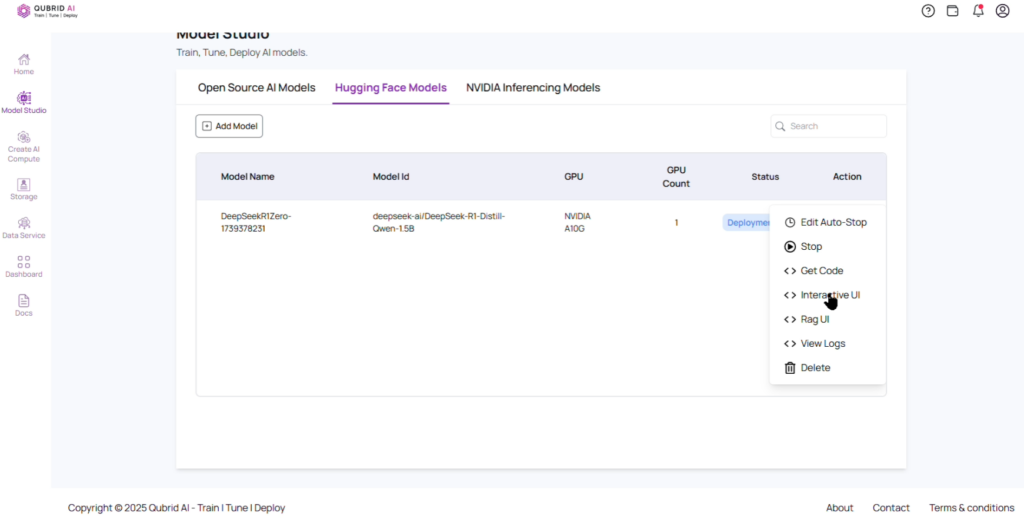
- Interactive UI: Use Qubrid AI interactive UI option to tune your deployed model without coding by adjusting parameters on the left-side panel.
8.a. Navigate to Actions and Select “Interactive UI” to Fine-Tune Your Model
8.b. Write Your Prompt, Adjust Parameters, and Fine-Tune Easily
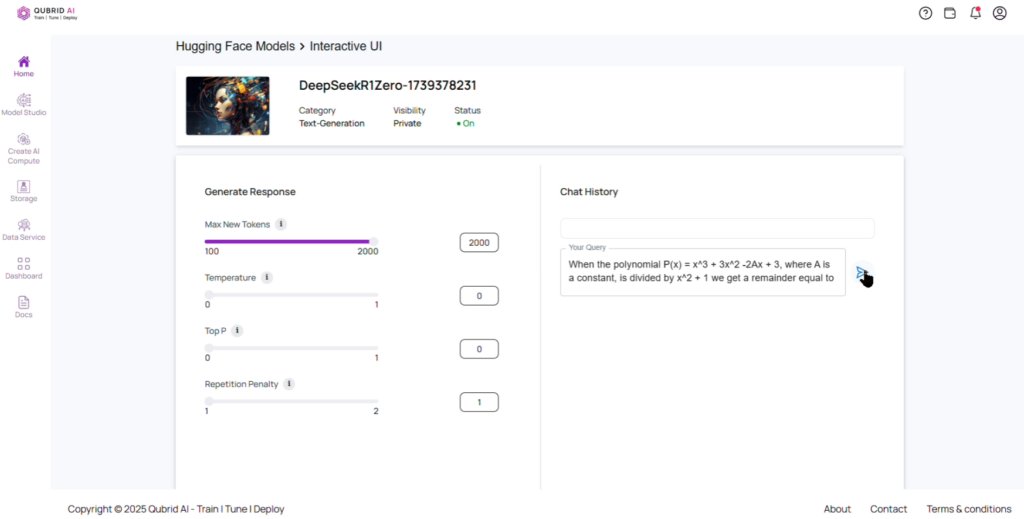
Interactive UI: Write, Adjust & Fine-Tune – Complete Guide
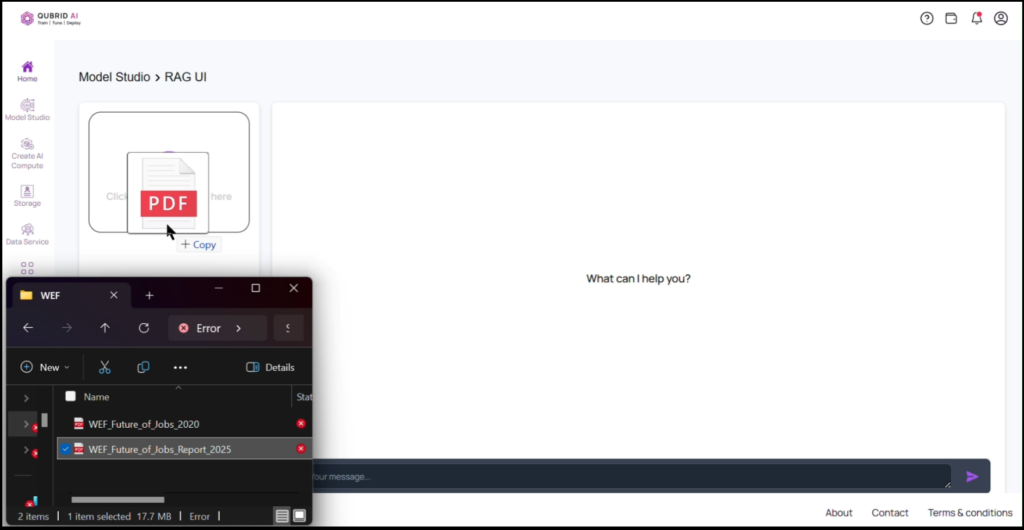
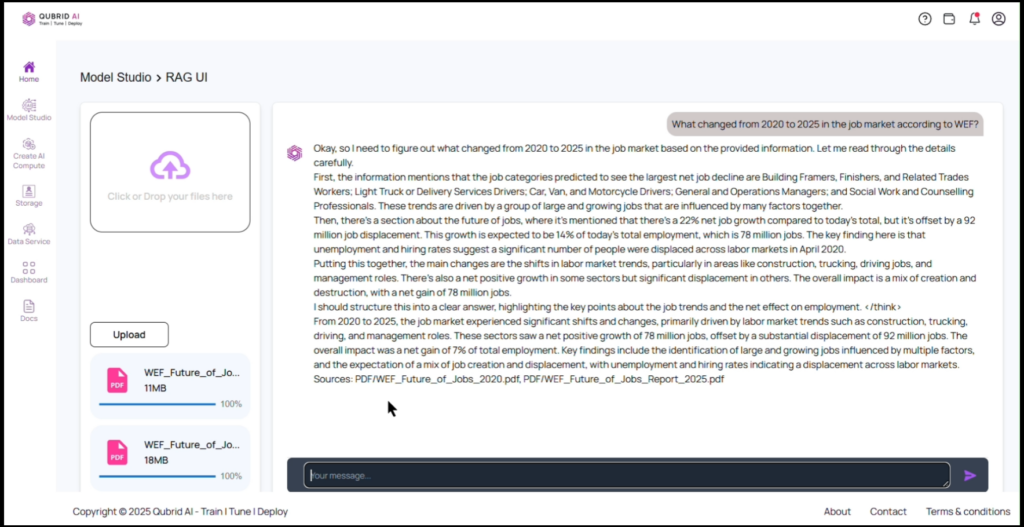
- RAG UI: Use Qubrid AI RAG UI to upload PDFs and chat with their content using a Retrieval-Augmented Generation (RAG) model for context-aware responses.
For more information on how to Interact with RAG UI visit: Interacting with RAG UI on Qubrid AI Platform
9.a. Navigate to Actions and Select “RAG UI”
9.b. Select the document(s) you want to interact with and upload. Wait for the system to process and index the document.
9.c. Use the chat interface to ask questions related to the content of the uploaded document.
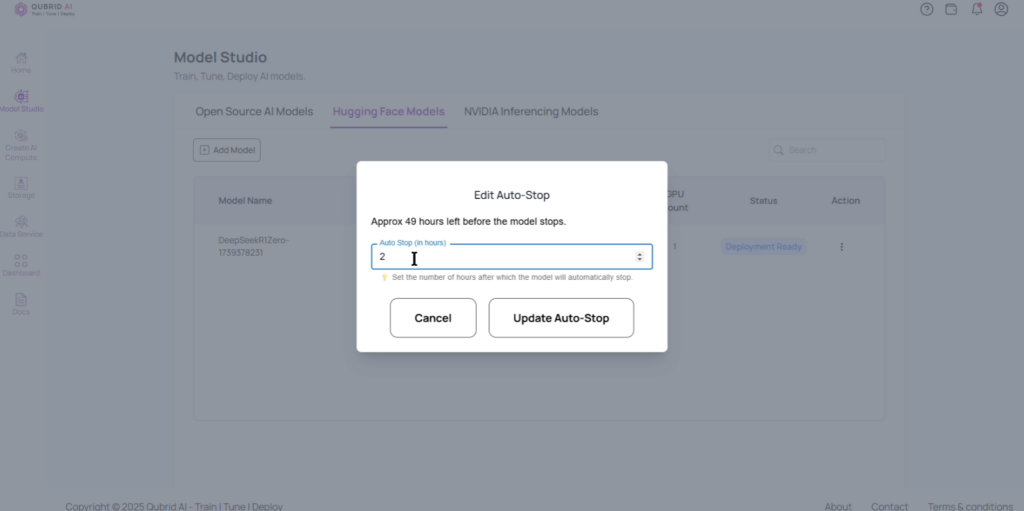
- Edit Auto-Stop
10.a. Adjust the auto-stop timer by clicking “Edit Auto-Stop” in the action section.

10.b. Update the stop duration(in hours) as needed.
Edit Auto-Stop – Complete Guide
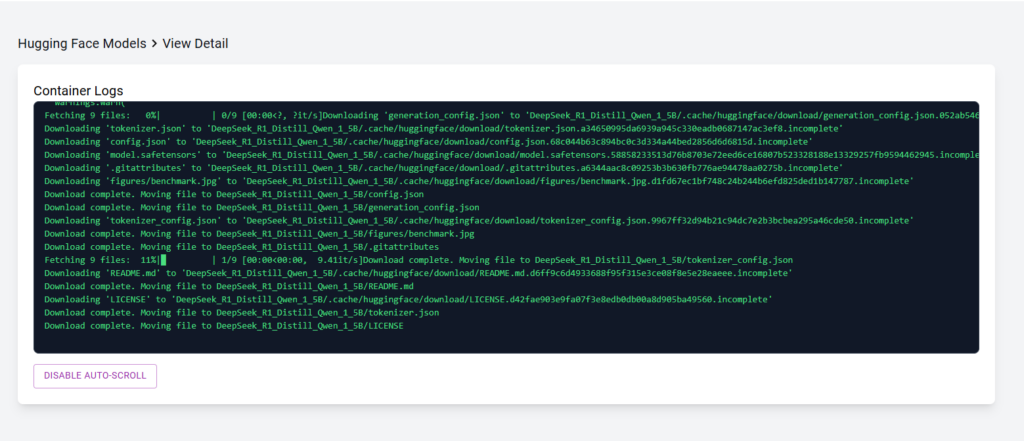
- View Log
11.a. Go to “Action” section, click “View Log” to view the logs of the deployment.
11.b. View Log Detail
- Start/Stop Deployment
12.a. Go to “Action” section, click “Stop” to immediately halt the deployment.
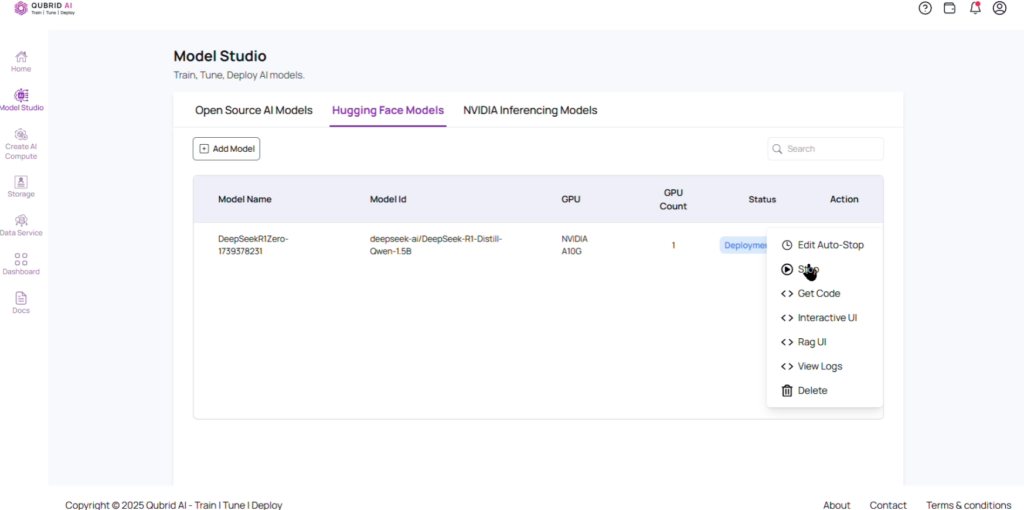
Stopping the Model – Complete Guide
- Delete Model
13.a. Go to “Action” section, click “Delete” to remove the deployed model from the platform.

13.b. Confirm before deleting the model, as it cannot be retrieved once deleted.
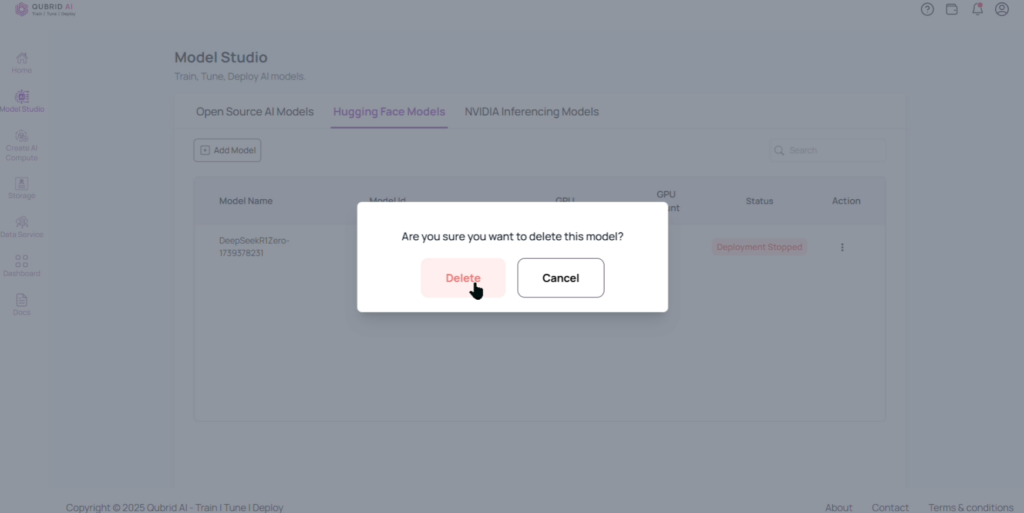
Deleting the Model – Complete Guide