1. Downloading the Software
To download the AI Controller Beta Version, please contact your Account Manager.
2. Installing AI Controller on Linux
Supported Platforms
AI Controller provides a .deb package for the following Linux distributions and architectures:
| Platform | x86_64 / amd64 |
|---|---|
| Ubuntu 22.04 LTS | ✅ |
Supported GPUs
Data Center – L Series (L40, L40s, L4) , H series (H100 PCIe, H100 NVL), A series (A100, A30, A40, A10), RTX ( 6000 ADA, 5000 ADA, 4000 ADA, A5000, A6000, A4000), T Series (T4), V Series (V100),
GeForce – RTX 40 Series ( RTX 4090, RTX 4090D, RTX 4080, RTX 4080 Super, RTX 4070, RTX 4070 Ti, RTX 4070 Super, RTX 4060), RTX 30 Series ( RTX 3090, RTX 3090 Ti, RTX 3080, RTX 3080 Ti, RTX 3070, RTX 3070 Ti, RTX 3060, RTX 3060Ti, RTX 3050)
3. General System Requirements
To install AI Controller successfully, ensure your Linux host meets the following requirements:
- 64-bit kernel and CPU support for virtualization.
- At least 16 GB of RAM.
- Minimum 8 CPU Cores.
- Ubuntu 22.04 LTS
- Python 3.10 and above
Generic Installation Steps
Important
Ensure you meet the system requirements outlined earlier and follow the distro-specific prerequisites.
Note:
- Ensure the system has a proper internet connection during installation.
- Enable ports (3000, 4000, 5000) on the system.
- Ensure the ports (4000-5000) should be opened on each node for users’ workload.
- Make sure all the Nodes have static IP addresses.
1. Download and Install
- Download the Installation Package:
- We will send you install package
2. Install the AI Controller
- Open your terminal.
- Navigate to the directory where
qubrid_packages.tar.bz2is located. - Install the package using the following command:
sudo apt-get update
sudo apt-get install bzip2
tar xvf qubrid_packages.tar.bz2
cd qubrid_packages
dpkg -i qubridAIcontroller-primary-node.deb  #for firstime installation of qubrid AIcontroller
dpkg -i qubridAIcontroller-primary-node.deb --force-overwrite  #for user already having previous version ofqubrid AIcontroller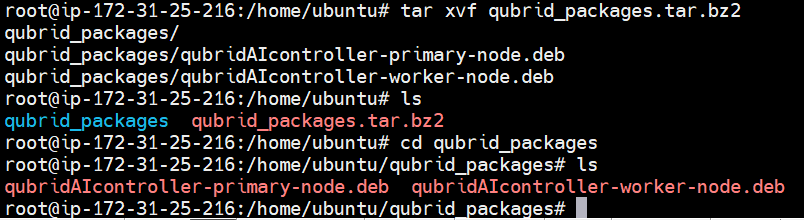
Note: Choose the packages according to the Node type (primary or worker node).
3. Start the AI Controller on the Primary Node
- After installation, launch
Qubrid AI Controllerby typing the following command in your terminal:
qubridAIcontroller

Note: The installation process will be the same for each node.
4. Access the AI Controller
- Hit below URLs on any browser in local network
- http://localhost:3000 – if you are accessing from the same server’s browser.
- http://<primary-node-ip>:3000 – if you are accessing from different servers browser in the same internal network.
Accepting Terms
Select “Accept” to continue. Qubrid AI Controller starts after you accept the terms. Note that Qubrid AI Controller will not run if you do not agree to the terms.
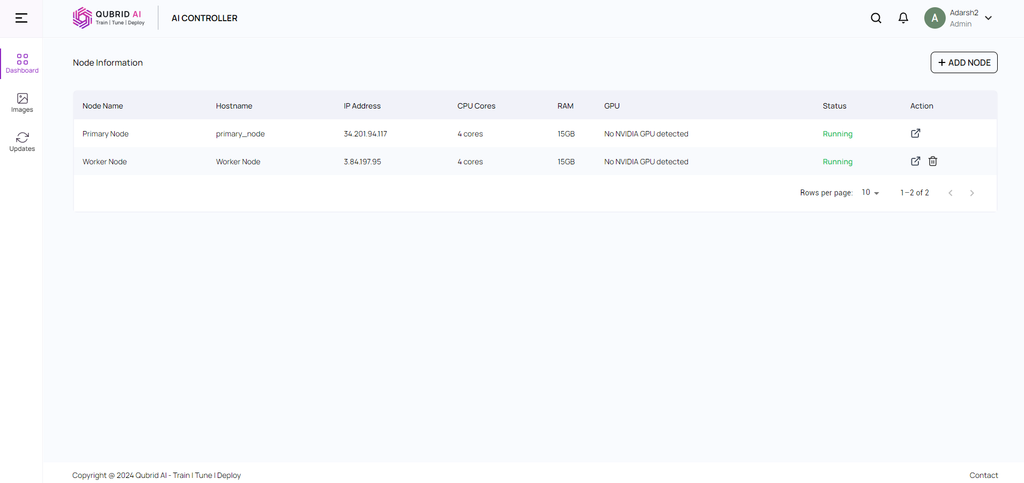
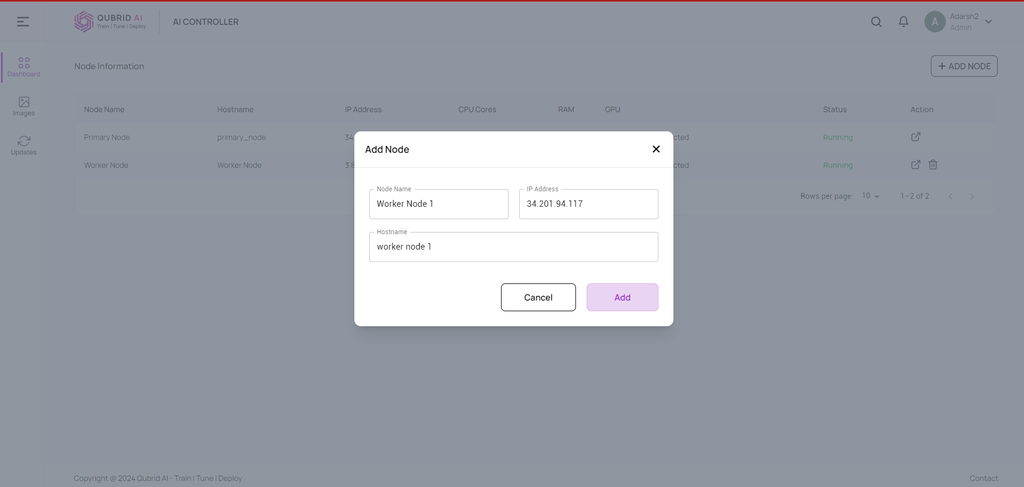
- Adding Worker Node
You need to enter the Node Name of your choice, the IP static address, and the hostname (pre-configured) of the node.
6. Launching Tensorflow Image
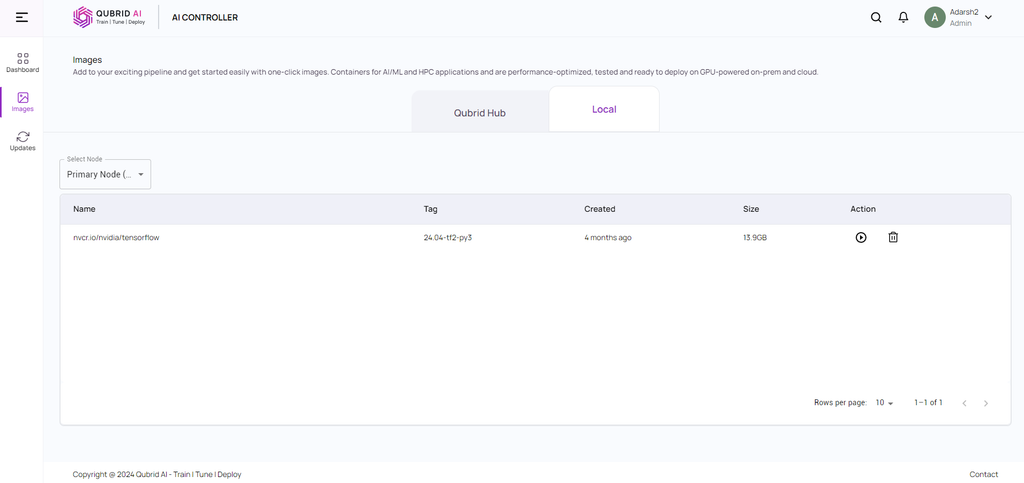
You can download the Tensorflow image on the desired node (e.g. primary node).
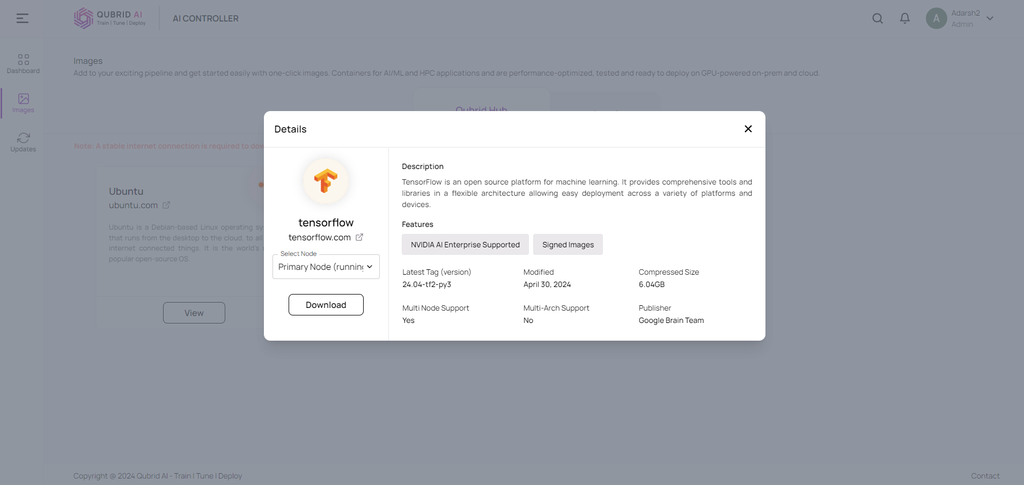
After successfully downloading the image, you can verify the same in the “Local” tab.
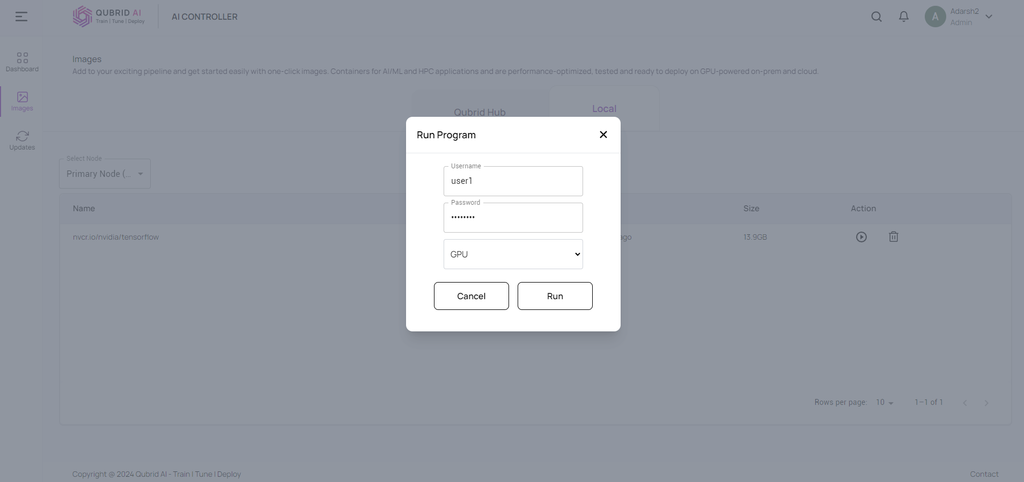
For launching a container against a user, you need to fill in details (like username, and password – specifically for the user’s Jupyter notebook, and select the GPU if Node has GPU otherwise leave that unattended).
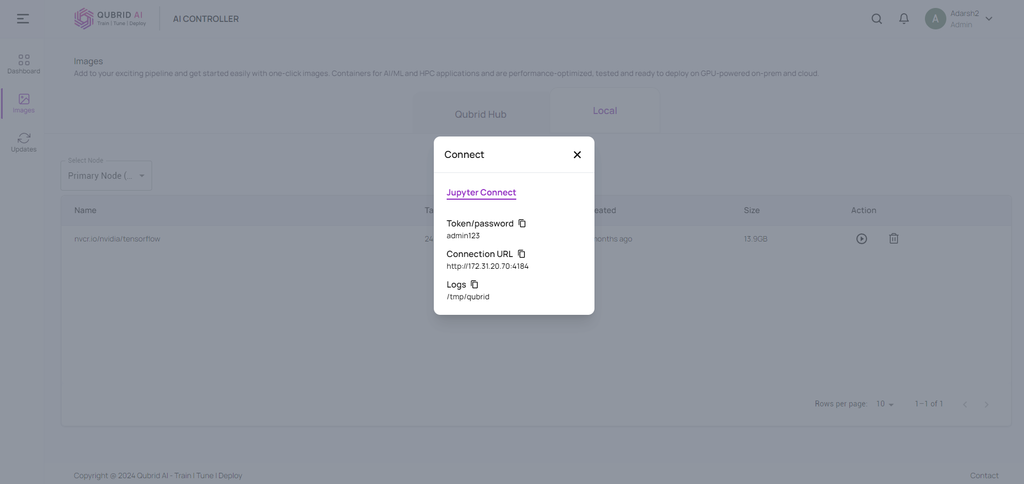
You can share the Jupyter Note url and corresponding password with the user. It can be accessed from any machine within the network.
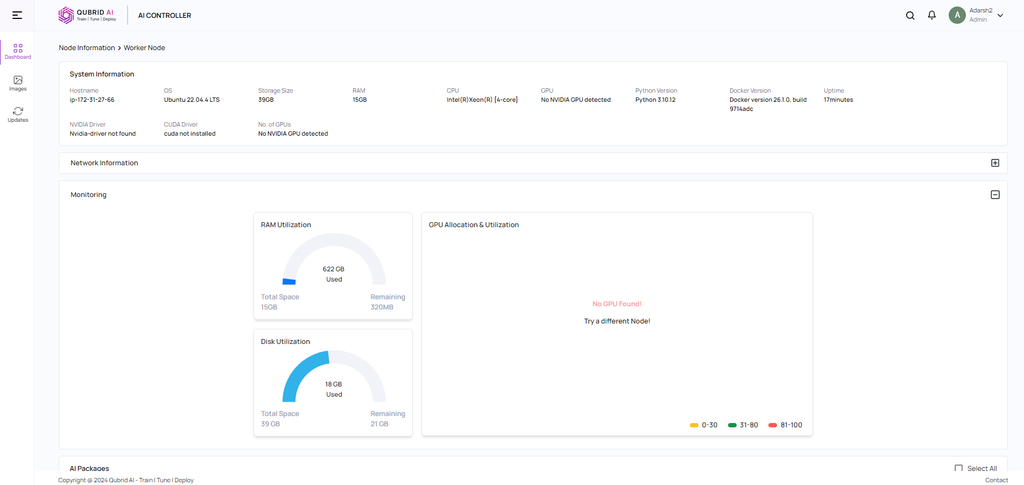
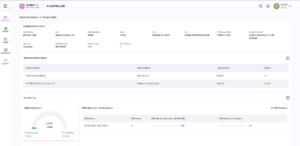
7. Performance Dashboard for Nodes
For in-depth details of individual nodes – you can click on ![]()
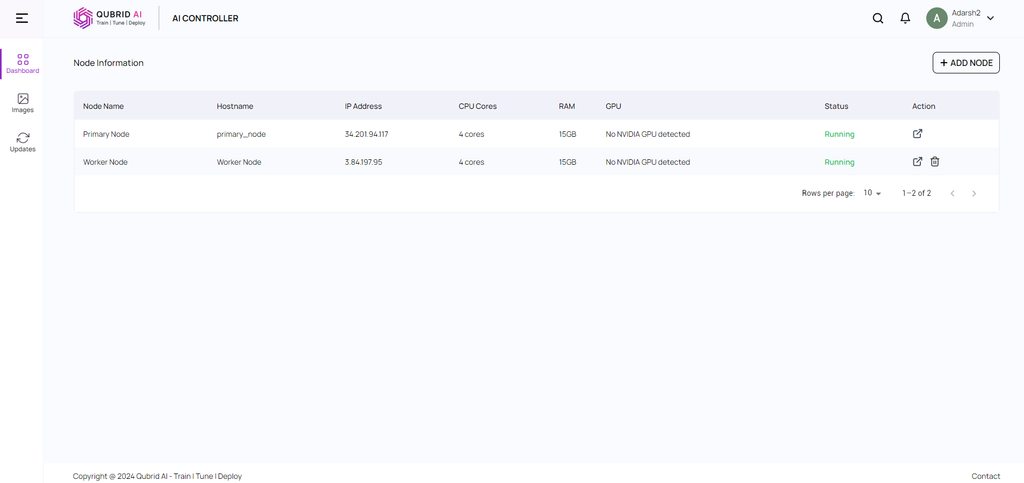
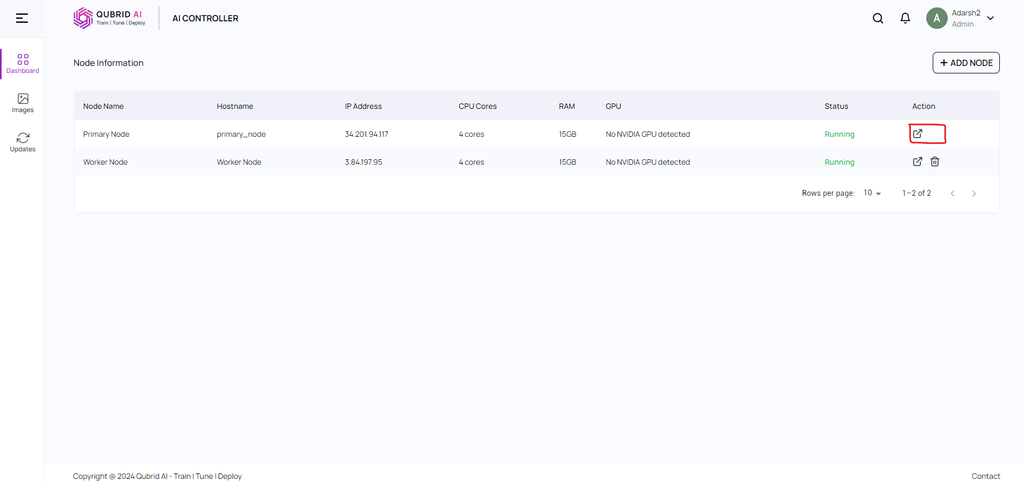
Detailed view of individual nodes.