
This section guides you through launching compute instances and utilizing Jupyter Notebook for your specific use case on the QUBRID AI platform.
Launching a GPU Instance :
- Log in to the Qubrid AI platform.
- On the home page, navigate to the “AI Compute” section.
- Select “GPU” from the options. This will display available GPU configurations.
- Choose the desired GPU configuration that aligns with your computational needs.
Notes & Warnings:
- Regardless of your selection (Free Tier CPU or paid GPU), the launched instance will take approximately 3 minutes to set up and display the Jupyter Notebook interface.
- All launched instances, including those from the Free Tier, will be automatically terminated 60 minutes after the Jupyter Notebook is launched. This ensures optimal resource allocation.
- Credits will be deducted from your wallet based on the chosen GPU configuration and usage duration. Refer to the platform’s pricing information for details.
Launching a CPU Instance
- Log in to the Qubrid AI platform.
- On the home page, navigate to the “AI Compute” section.
- Select “CPU” from the resource type options. This will display available CPU configurations.
- Choose the desired CPU configuration that aligns with your computational needs.
- For Free Tier: If you want to try a free CPU instance for basic tasks, select “CPU” from the resource type options and click on “Launch Notebook” under the Free Tier banner.
Notes & Warnings:
- Refer to the notes and warnings mentioned in the “Launching a GPU Instance” section. They apply identically to launching CPU instances (except for potential pricing differences based on the chosen configuration).
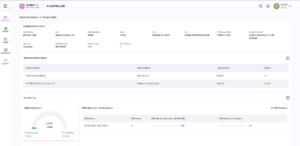
Checking for Launched Notebooks (For Both CPU and GPU):
If you’re unsure whether a notebook has been launched after initiating the process, you can verify its status:
- Go to the “Dashboard” section on the QUBRID AI platform.
- Look for the “Open Notebook” icon and click on it.
Deleting Instances
Once you’ve finished using your launched instance (GPU or CPU), you can terminate it to optimize resource allocation and avoid unnecessary charges. Here’s how to delete an instance:
- Go to the “Dashboard” section on the QUBRID AI platform.
- Locate the instance you want to delete in the list.
- Click on the “Delete” icon associated with that particular instance.
- A confirmation prompt will appear. Click “Delete” again to confirm the termination.
Notification Upon Deletion
You will receive a notification from the Qubrid AI platform once the deletion process is complete. This notification will inform you that the instance has been successfully terminated.